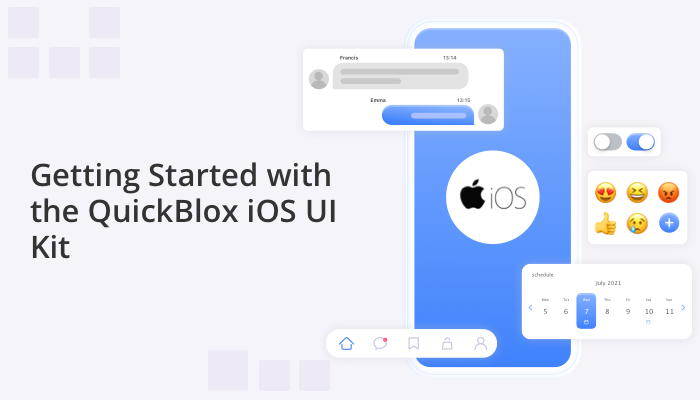
If you’re an iOS developer seeking to incorporate powerful messaging capabilities into your app, the QuickBlox iOS UI Kit is here to simplify the process. With its intuitive interface and extensive functionality, this UI Kit empowers developers to seamlessly integrate real-time messaging into their iOS applications.
Whether you’re creating a chat application, a collaborative platform, or a social networking app, the QuickBlox chat UI Kit offers a wide range of pre-built components and features that significantly expedite the development process. In this guide, we will provide a step-by-step walkthrough of setting up and incorporating the QuickBlox iOS UI Kit into your own project, enabling you to enhance your iOS apps with seamless real-time communication capabilities.
By leveraging the convenience and power of the QuickBlox UI Kit, you can create a chat feature that fosters smoother connections, efficient information exchange, and ultimately, an improved user experience. Join us as we explore the value of integrating chat functionality, the benefits it brings, and how it can strengthen your communication efforts and drive success in today’s competitive market.
Building Immersive Chat Experiences with the QuickBlox iOS UI Kit
The QuickBlox iOS UI Kit is a comprehensive package of pre-built user interface elements, components, and assets specifically designed for iOS app development. It offers a range of resources that enable iOS developers to save valuable time and create visually appealing applications with consistent UI styles and interactions.
With the QuickBlox UI Kit for iOS, developers can take advantage of the following features:
- List of dialogs: Display a list of conversations or chats for users to choose from.
- Create dialog: Enable users to create private or group dialogs for seamless communication.
- Dialog screen: Provide a dedicated screen for users to view and interact with the selected dialog.
- Send text, image, video, audio, and file messages: Support various types of messages to facilitate rich communication.
- Dialog info screen: Allow users to view and manage dialog details such as participants and settings.
- List, invite, and remove members: Manage the members of group dialogs by adding or removing participants.
- Video calling features (coming soon): Enhance communication with video calling capabilities, soon to be added.
By leveraging the QuickBlox iOS UI Kit, developers can streamline the integration of chat functionality into their iOS applications, creating an immersive real-time messaging experience. Now, let’s dive into the step-by-step process of creating an application using the QuickBlox iOS UI Kit.
Learn more about: Create Exceptional Chat Experiences with QuickBlox’s Chat UI Kits
Step 1: Getting Started
To get started with the QuickBlox iOS UI Kit, you’ll need a QuickBlox account. If you don’t already have one, you can easily register for an account on the QuickBlox website.
Once you have your QuickBlox account, follow these steps to create a new iOS SwiftUI project using Xcode:
- Open Xcode on your Mac.
- Click on “Create a new Xcode project” or go to File > New > Project.
- In the template selection screen, choose “App” under the “iOS” tab.
- Enter a Product Name for your project and choose the desired Organization Identifier.
- Select a Team to sign your app.
- Select “SwiftUI” as the User Interface option and click “Next.”
- Choose the desired location to save your project and click “Create.”
Congratulations! You have successfully created a new iOS SwiftUI project using Xcode.
Next, you can read our earlier blog post titled How to Create an App and Use the QuickBlox Admin Panel. This guide will walk you through the process of setting up and accessing your App credentials in the QuickBlox Admin Panel, which you will need in Step 3 of this guide.
By following these initial steps and creating your iOS SwiftUI project, you’re ready to proceed to Step 2 and start incorporating the QuickBlox iOS UI Kit into your application.
Step 2: Integrate QuickBlox iOS UI Kit into your application
Now that you have your iOS SwiftUI project setup, it’s time to integrate the QuickBlox iOS UI Kit into your application. The QuickBlox iOS UI Kit is available as a Swift Package, which makes it easy to add to your project. Follow these steps to integrate the QuickBlox iOS UI Kit:
- In Xcode, open your project by double-clicking on the .xcodeproj file.
- Navigate to the project navigator, usually located in the left sidebar.
- Right-click on the folder that represents your project, and select “Swift Packages” > “Add Package Dependency.”
- In the dialog that appears, enter the URL for the QuickBlox iOS UI Kit Swift Package https://github.com/QuickBlox/ios-ui-kit.
- Click “Next” and choose the desired version or branch of the Swift Package. You can also specify a version requirement if needed.
- Xcode will resolve the package and display a confirmation dialog. Ensure that your main target is selected in the “Add to” dropdown, and click “Finish” to add the package to your project.
Congratulations! You have successfully integrated the QuickBlox iOS UI Kit into your application.
Step 3: Initialize the QuickBlox SDK
Now that you have integrated the QuickBlox iOS UI Kit into your application, the next step is to initialize the QuickBlox SDK. Initialization involves setting up the necessary configuration and preparing the SDK to be used in your development environment or application.
To initialize the QuickBlox SDK, you will need to provide the following credentials: Application ID, Authorization Key, Authorization Secret, and Account Key. These credentials can be obtained from the QuickBlox Admin Panel. If you’re unsure how to obtain these credentials, refer to our tutorial titled How to Create an App and Use the QuickBlox Admin Panel for detailed instructions.
Example initialization code:
import Quickblox

// ...

func initializeQuickBloxSDK() {
    let applicationID: UInt = "Your_Application_ID"
    let authKey = "Your_Authorization_Key"
    let authSecret = "Your_Authorization_Secret"
    let accountKey = "Your_Account_Key"

    Quickblox.initWithApplicationId(applicationID,
                                    authKey: authKey,
                                    authSecret: authSecret,
                                    accountKey: accountKey")

}

// Call the initialization method somewhere in your application setup process
initializeQuickBloxSDK()
Make sure to replace the placeholder values with your actual credentials.
Step 4: Authenticate users & implement chat functionality
Before users can send their first message, it’s essential to authenticate them within the QuickBlox system. QuickBlox provides various authentication methods, and you can explore more details in our official documentation. In the example below, we demonstrate user authentication using a login and password.
import QuickBloxUIKit
import Quickblox

struct ContentView: View {
    @State private var isPresented = false

    var body: some View {
        Button("Present!") {
            authenticateUser()
        }
        .fullScreenCover(isPresented: $isPresented) {
		// show Dialogs screen
            QuickBloxUIKit.dialogsView()
        }
    }

    func authenticateUser() {
        QBRequest.logIn(withUserLogin: "userLogin",
password: "userPassword",
successBlock: { (response, user) in
            // Block with response and user instances if the request is succeeded.
            self.isPresented.toggle()
        }, errorBlock: { (response) in
            // Block with response instance if the request is failed.
        })
    }
}
By calling the authenticateUser() function, users will be authenticated using their login credentials. If the authentication request is successful, the isPresented state variable is toggled, and the Dialogs screen is displayed using QuickBloxUIKit.
Next Steps:
To further explore the capabilities of the QuickBlox iOS UI Kit and learn more about customizing the interface for your application, we recommend checking out our iOS UIKit Sample. In this sample, we have implemented the steps described above and provided additional examples, including changing the color scheme and more. It’s a great resource to see the UI Kit in action and gain inspiration for your own app development.
In addition, you can refer to the documentation to delve deeper into the features, functionality, and customization options available.
Stay tuned for our upcoming article where we will showcase new functions and share insights on customizing the interface even further. We’re excited to continue supporting you on your app development journey.
Have Questions? Need Support?
Join the QuickBlox Developer Discord Community, where you can share ideas, learn about our software, & get support.
Join QuickBlox Discord
 AI Agent — automate conversations and workflows. Now available on Free plan