==

Q-Consultation for every industry

Securely hold virtual meetings and video conferences

Learn More>

Want to learn more about our products and services?

Speak to us now

Firebase Cloud Messaging (FCM) Migration Guide

Hitesh Garg
2 Apr 2024
FCM Migration

Heads Up, Quickblox Developers: Time to Migrate Your FCM Push Notifications!

This guide is for all Quickblox users who rely on Firebase Cloud Messaging (FCM) for push notifications in their apps. Firebase is retiring their legacy API on June 20, 2024. Don’t worry, this update won’t disrupt your notifications – but you’ll need to migrate to the new HTTP v1 API as soon as possible to keep them flowing. This guide will walk you through the process step-by-step, ensuring a smooth transition. Let’s get started!

FCM

Note: No changes are required on QuickBlox client side SDKs.

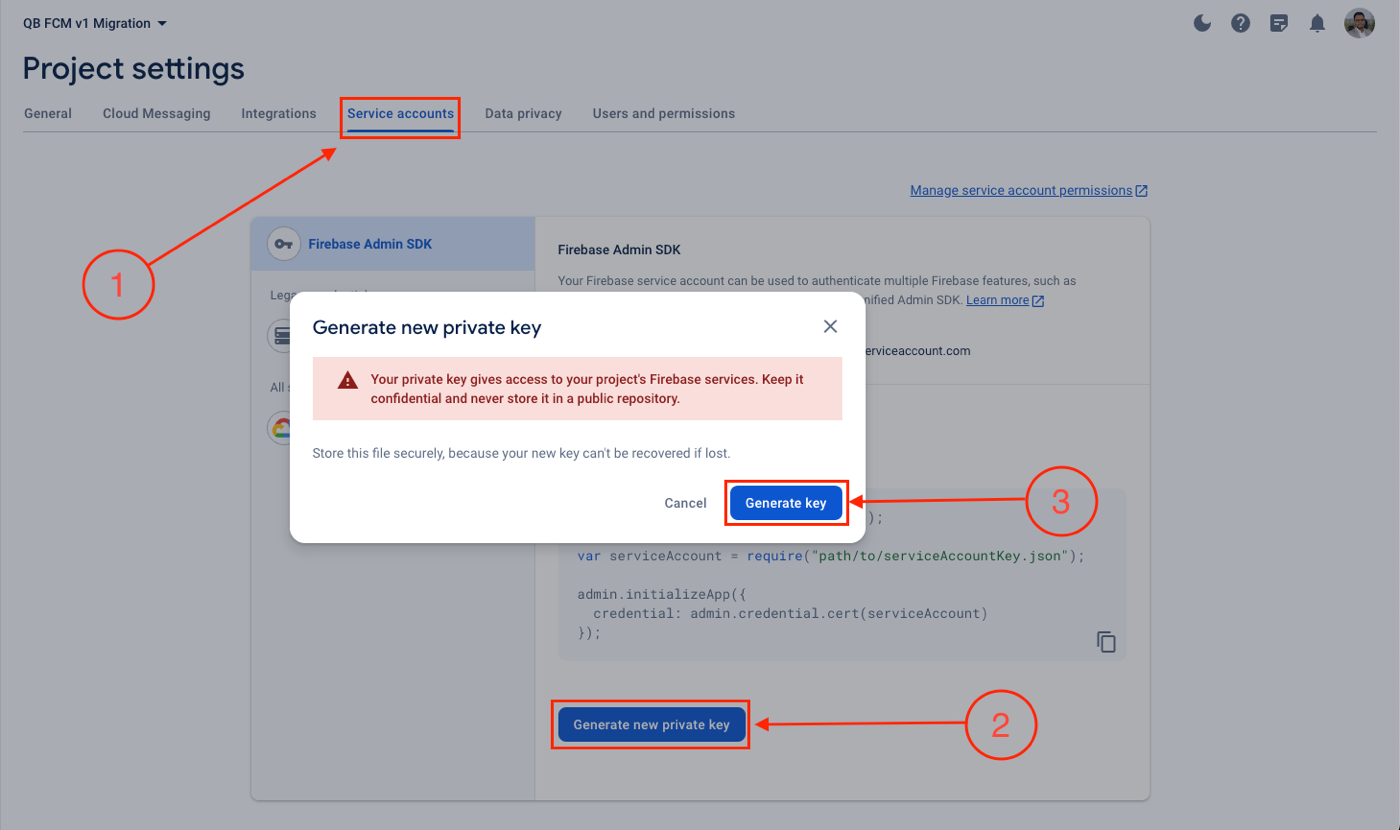
Step-1: Generate a new service account key

Generate Service Account Key

To generate a new service account key, you need to:

  1. Open the Firebase console and select your project.
  2. Go to Project settings > Service Accounts.
  3. Click on Generate new private key and confirm by clicking Generate key.
  4. Securely store the JSON file containing the private key that will be downloaded.

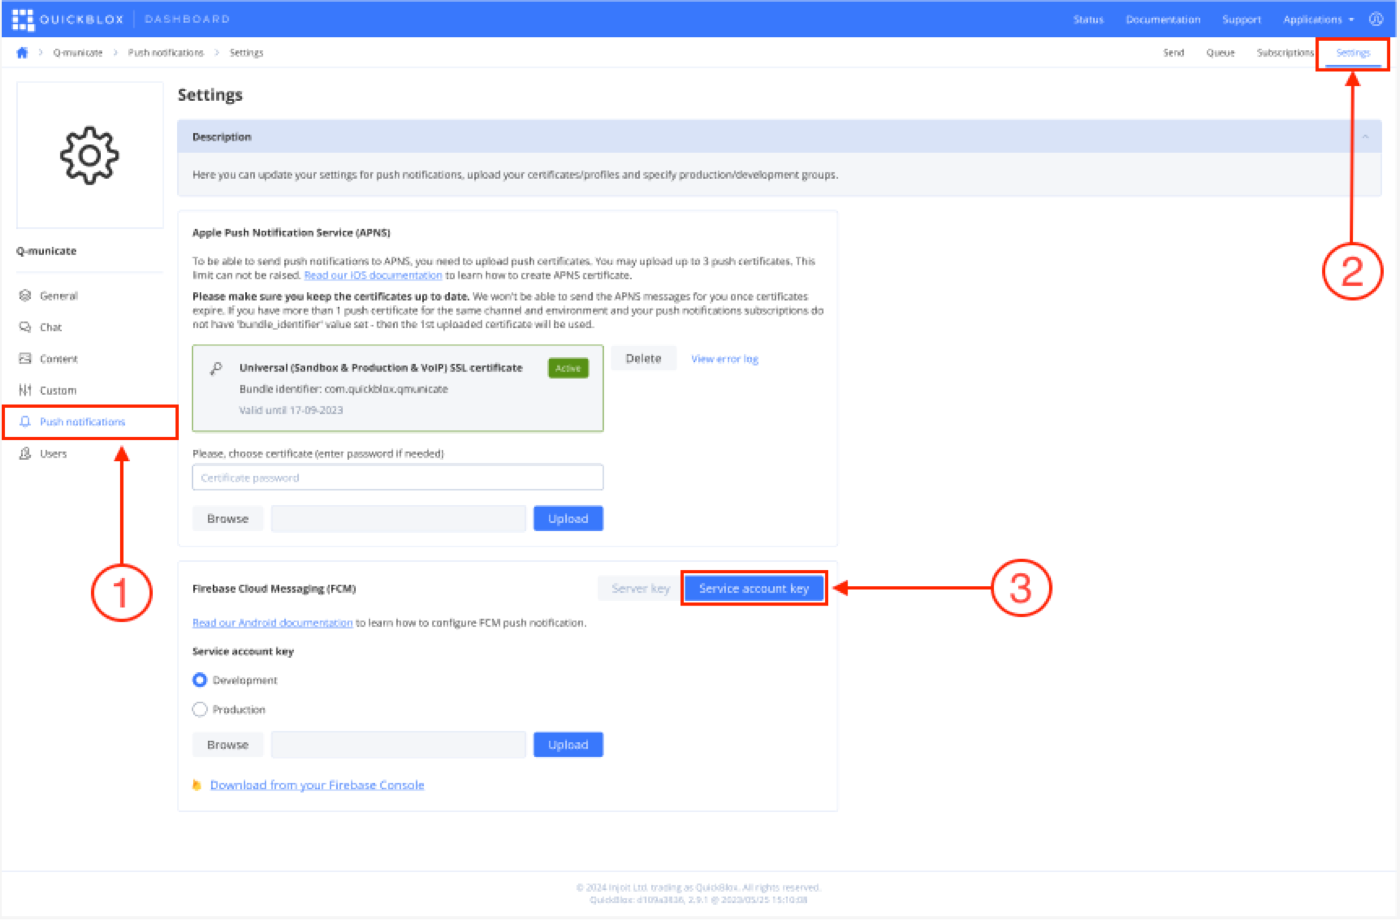
Step-2: Navigate to the push notifications section on QuickBlox dashboard

push notification section on QuickBlox dashboard

To navigate to the push notifications section:

  1. Head over to QuickBlox dashboard, and choose your application.
  2. Select the push notifications tab and navigate to the settings page.
  3. Select the Service account key tab

Note: we will remove the Server key tab when it will be discontinued by FCM, you will by default only have the service account key section on the dashboard.

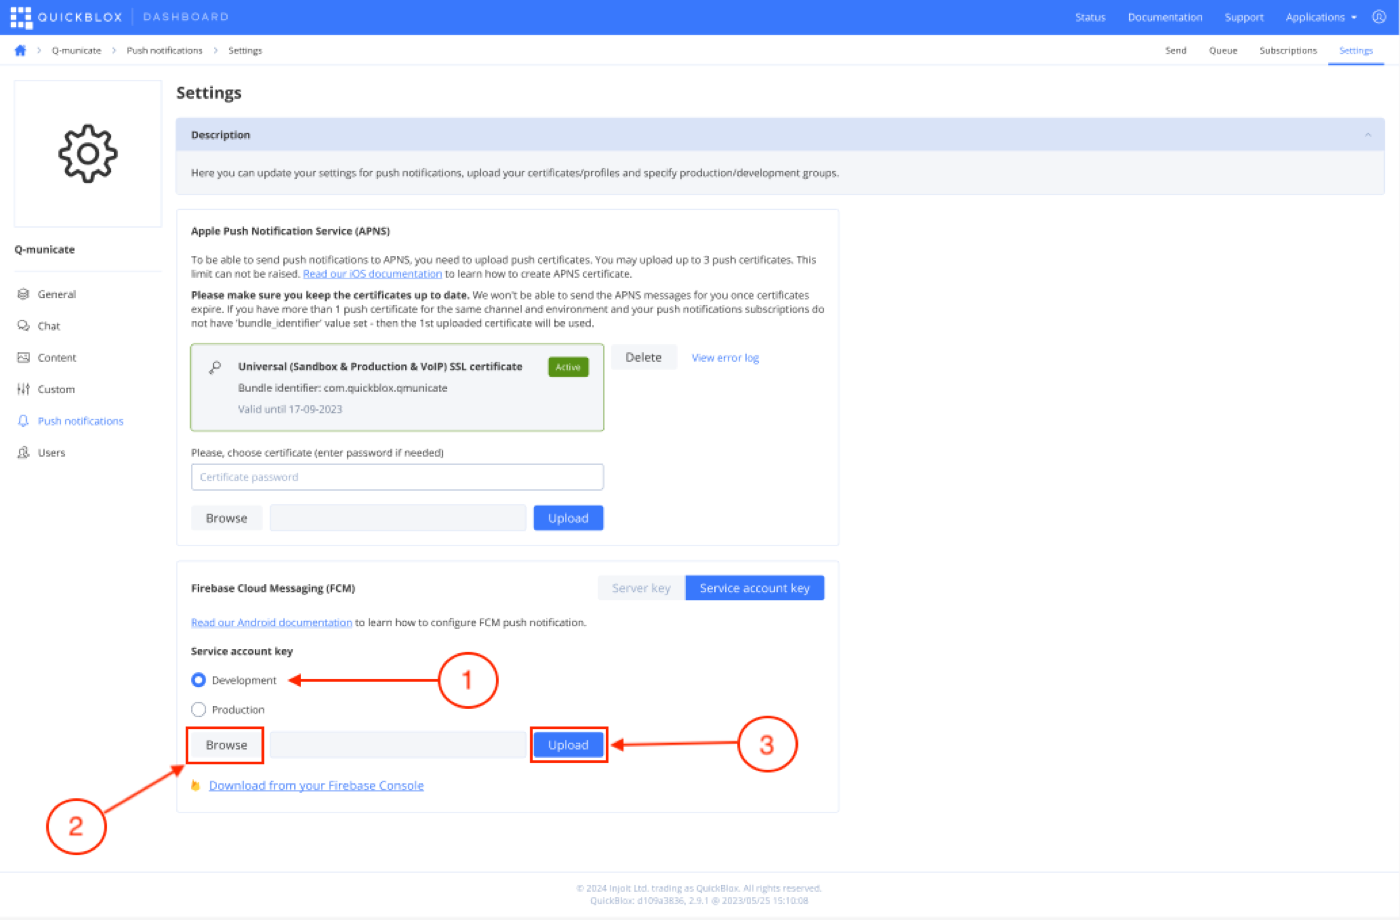
Step-3: Upload the service account key on QuickBlox dashboard

Upload the service account key on QuickBlox dashboard

To upload your service account key:

  1. Choose the environment for your service account key. (Development/Production)
  2. Click on the browse button and select the JSON file containing the key that was downloaded in step-1.
  3. Hit the upload button.

Note: When setting up your environment, it’s important to distinguish between development and production modes. If you’ve uploaded a development certificate, it will only function for subscriptions created in the development environment, and likewise for production. This separation ensures seamless testing and deployment of push notifications across different environments.

Step-4 Test your push notifications

After uploading your service account key, you should test if your push notifications are working properly or not.

Note: Before sending the push notification make sure you have the proper service account key setup in the settings page and you have at least 1 valid subscription to receive the push notification.

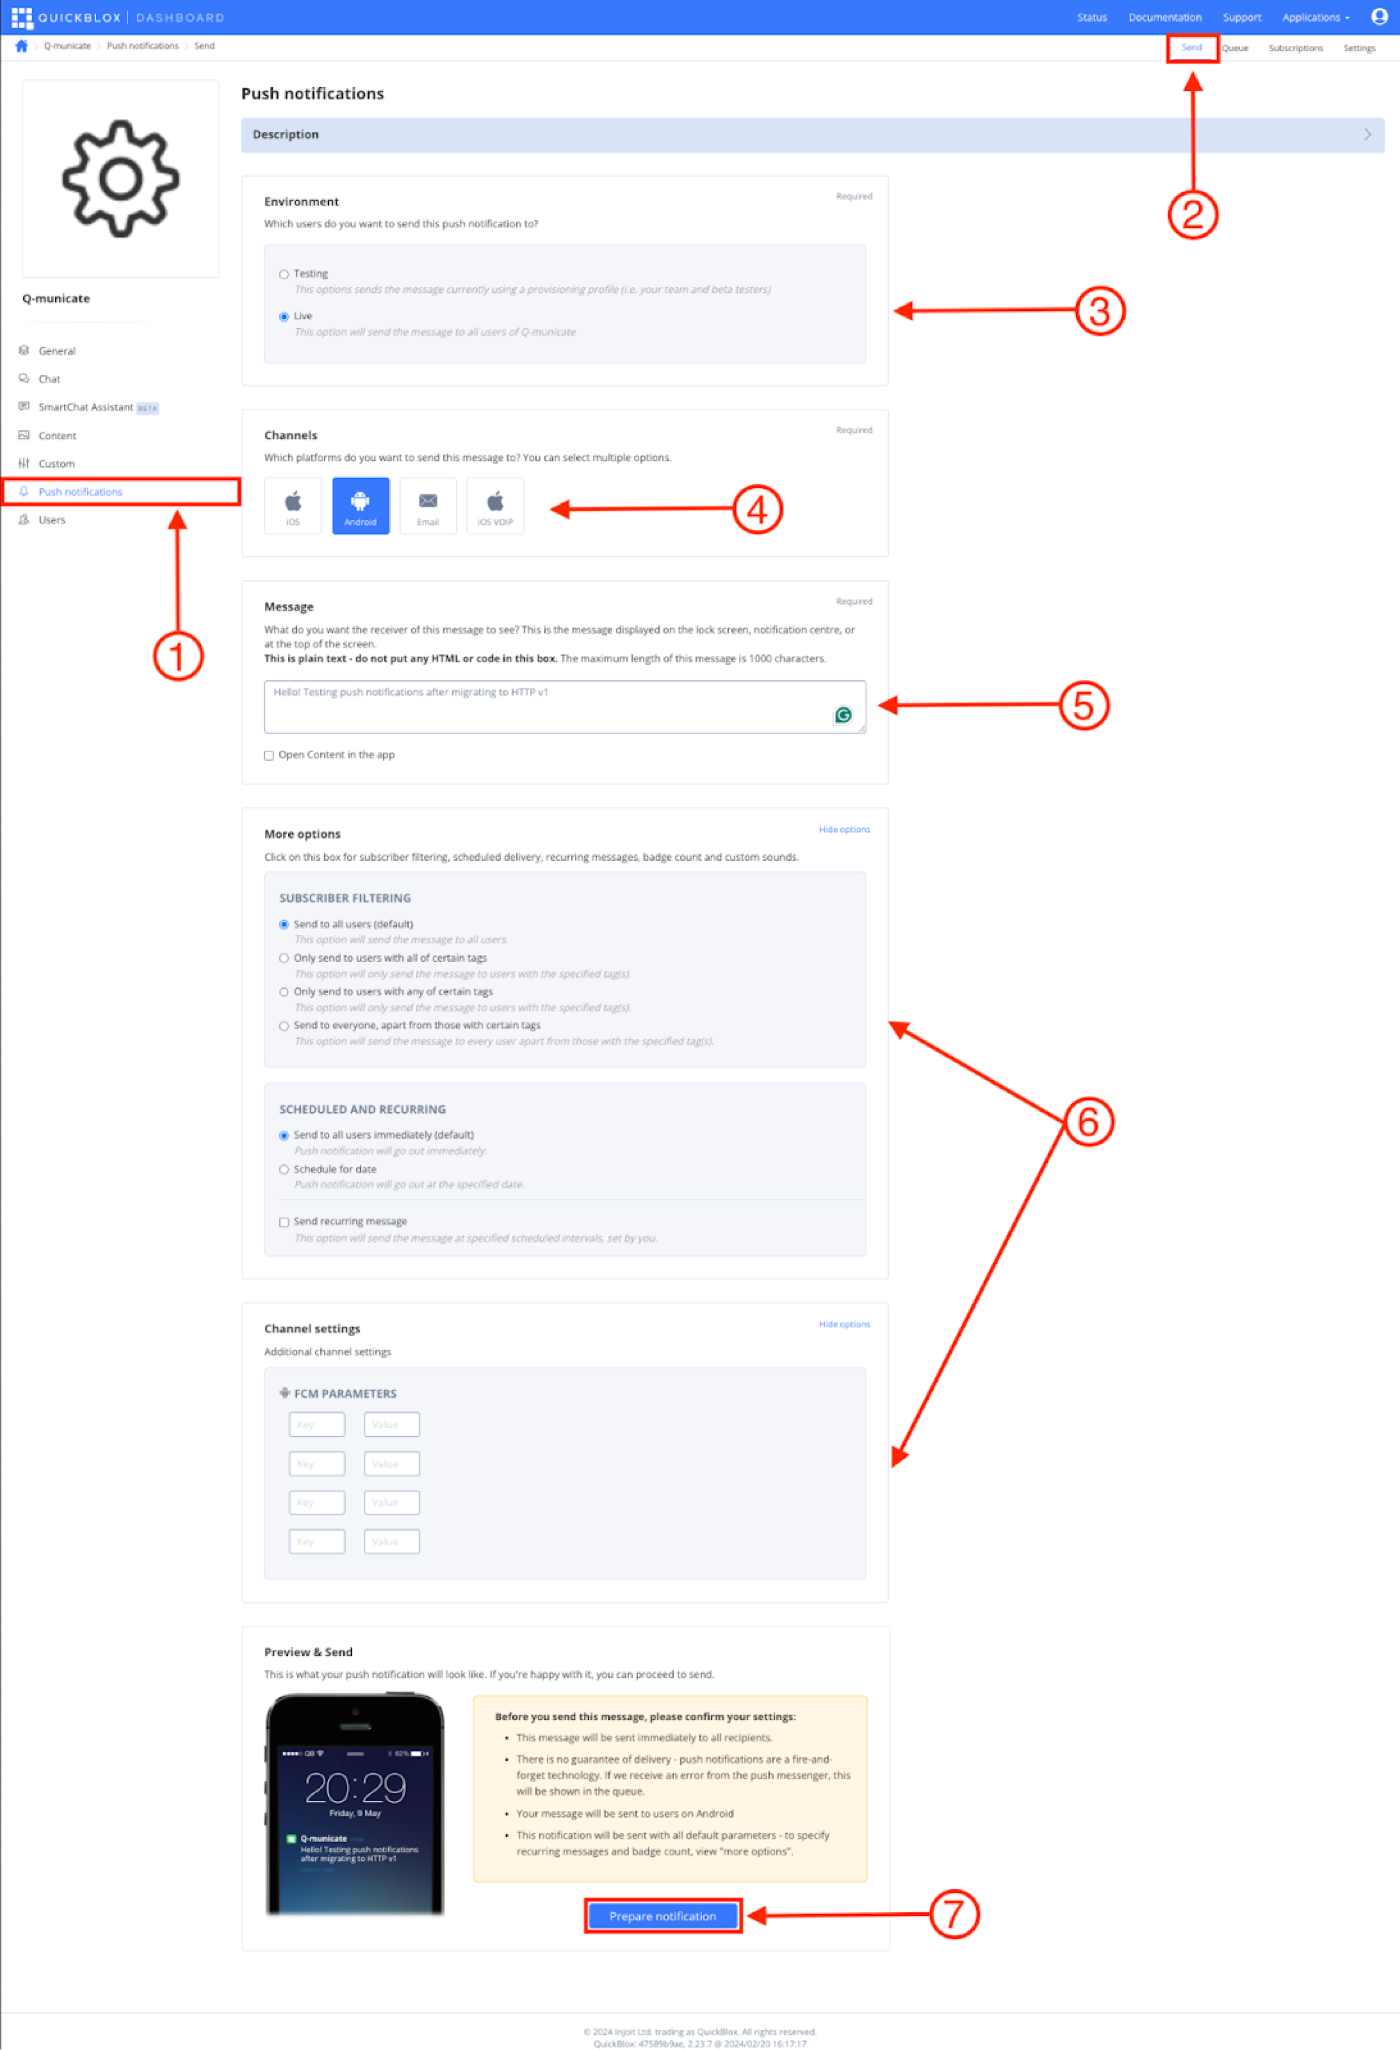
Test push notifications

To test your push notifications:

  1. Head over to QuickBlox dashboard, and choose your application
  2. Select the push notifications tab and navigate to the send page
  3. Choose your desired environment (Testing/Live)
  4. Choose the required channel (Android in this case)
  5. Fill in the text to be delivered with the push notification
  6. Configure additional options related to the audience for the notification and additional channel settings (if any).
  7. Click on Prepare notification button

Voila! You should now receive the push notification on your mobile device(s).

Have Questions? Need Support?

Join the QuickBlox Developer Discord Community, where you can share ideas, learn about our software, & get support.

Join QuickBlox Discord

Read More

Ready to get started?

QUICKBLOX
QuickBlox post-box