At QuickBlox, our mission is to empower developers by simplifying AI integrations into React applications. In a world that knows no linguistic boundaries, we’re thrilled to introduce you to a transformative tool that can revolutionize your app’s communication capabilities – AI Translate. Imagine the ability to enable real-time translation and effortlessly bridge language gaps.. This tutorial is your guide to seamlessly integrating the AI Translate feature into your application, utilizing the power of QuickBlox’s React UI Kit. By harnessing OpenAI’s GPT technology, we’re equipping you to enrich your app with AI-enhanced communication, effortlessly breaking language barriers and creating a more connected user experience.
AI Widgets for React
In previous blogs we have outlined a series of AI widgets we’re creating to elevate your React applications. Our intelligent React Widgets offer developers a user-friendly approach to infuse ordinary chats and video calls with state-of-the-art capabilities. From speech recognition to automatic translation, intelligent responses to transcription, chat summaries, and a myriad of AI-powered features, widgets empower you to enhance the communication experience like never before.
Check out these additional resources for adding AI features to Web Apps:
AI Chat Widgets: the easy way to add AI to your web chat app
Supercharge Your Web Chat Apps with ChatGPT AI Answer Assist
Getting Started
Guided by the principles of simplicity and developer-friendliness, we’ve crafted a series of straightforward steps to seamlessly integrate our OpenAI-based AI Translate widget into the React UI Kit.
Starting from version 0.2.1 of the Web UI Kit, AI functionalities are pre-enabled and are built upon OpenAI’s GPT chat. Thus, you only need to provide your API key.
To integrate the widget into your application, follow these few simple steps:
Step 1. Create application
You need to set up a React TypeScript project and integrate the QuickBlox UI Kit for React. The entire process consists of several stages:
- Creating a React project using TypeScript
- Adding dependencies to the React project
- Adding the QBconfig.ts file to your React application
- Possibly adjusting the project structure to your needs
- Configuring QuickBloxUIKitProvider
For instructions on how to do this, refer to the “Sending Your First Message” documentation.
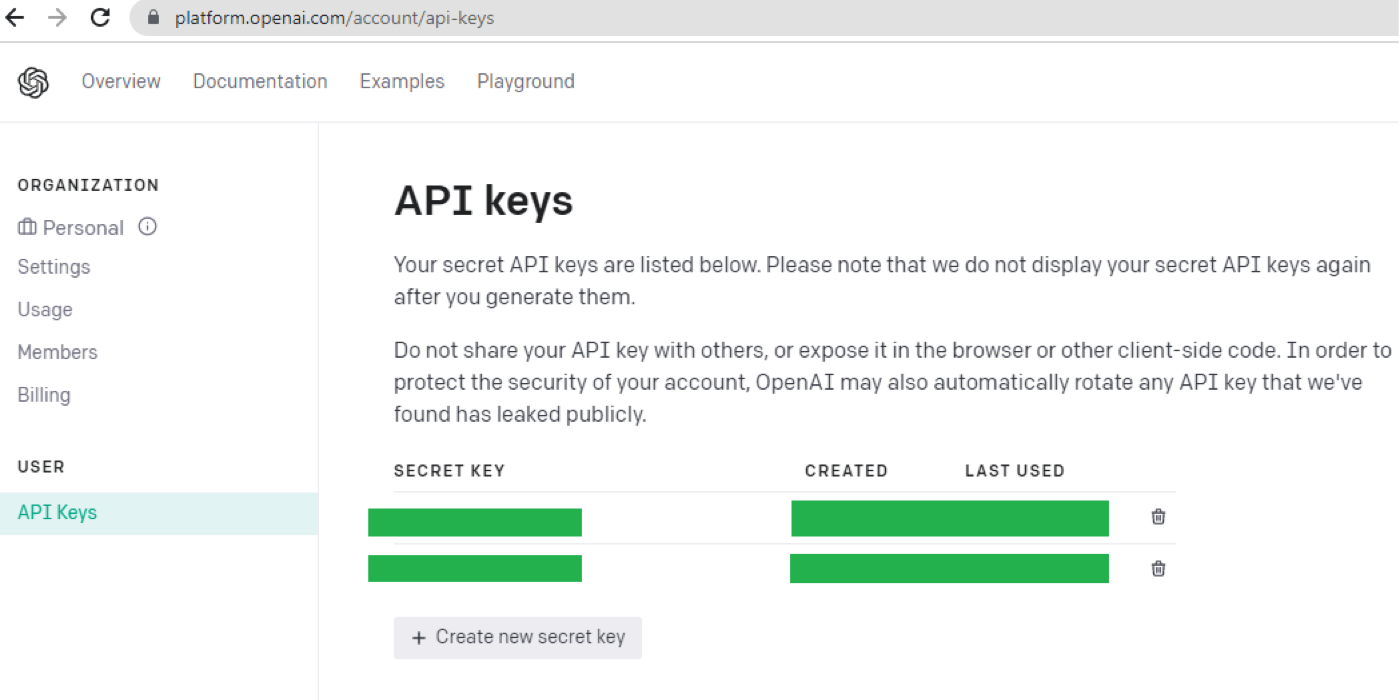
Step 2. Get an API Key in OpenAI
Create an account on OpenAI and obtain the service key.
- Visit the OpenAI website (openai.com).
- Click “Sign up” at the top of the page.
- Enter your name, email address, and a password.
- Select “Sign up” to create your account.
- Check your email for a verification link from OpenAI.
- Click the verification link to confirm your account.
- Log in to your OpenAI account with your email and password.
- Explore the OpenAI platform and its resources.
- Get an API Key. You can get an OpenAI API Key here by clicking on “+ Create new secret key”.
Step 3. Configure “configAIApi”
To enable or disable the AI Translate widget icon and its functionalities, you’ll need to modify the “configAIApi” section within the QBconfig.ts configuration file. This requires adjusting the relevant API key and parameters. Here’s the code snippet:
configAIApi: {
  AITranslateWidgetConfig: {
    apiKey: 'sk…qhU', // Replace with your real API key
    useDefault: true,
    defaultLanguage: 'English',
    languages: [
        'English',
        'Spanish',
        'French',
        'Portuguese',
        'German',
        'Ukrainian',
    ],
  },
}
Within the “defaultLanguage” category, you’ll have the choice to designate the primary translation language. If left unspecified, the system will opt for automatic language selection. To include additional translation languages, simply add them to the “languages” segment.
Please note: You do not need to store the API key in our UI toolkit. You can configure a proxy server (we plan to release a new example to illustrate proxy usage) or utilize external functions from Azure or AWS.
Whether you opt for a proxy server or external cloud functions, the configuration section should appear as follows.
configAIApi: {
  AITranslateWidgetConfig: {
    apiKey: '',
    useDefault: true,
    proxyConfig: {
      api: 'v1/chat/completions',
      servername: 'https://myproxy.com',
      port: '4032',
      sessionToken: '',
    },
  },
}
Step 4. Enable or Disable AI Translate using the following code
 <QuickBloxUIKitDesktopLayout
  theme={new CustomTheme()}
  AITranslate={{ enabled: true, default: true }}
/>
The QuickBloxUIKitDesktopLayout is a layout component that resides in the provider section. We covered this in our UI Kit documentation, “Send your First Message.”
The AI Translate component is pre-enabled in the Web UI Kit. However, if you wish to tailor its appearance or implement your unique logic, here’s the process to follow:
- Create a custom React hook that returns an object implementing the MessageWidget interface.
- Implement a custom method for rendering the widget.
- Assign this widget instead of the default one.
These steps are illustrated in the code below:
const openAIConfig = {
 ...QBConfig.configAIApi.AITranslateWidgetConfig.proxyConfig,
 sessionToken: token,
};
// …
If the user wants to customize the widget button’s appearance, they can create their own widget by overriding the rendering method. The following code exemplifies the default implementation:
export default function DefaultAITranslateWidget(apiKey: string): MessageWidget {
  const renderWidget = (): JSX.Element => {
   // return owner markup;
  };
  // ...
Wrapping up
As you wrap up your journey in implementing AI functionality and enhancing your app’s communication capabilities, we’re thrilled to announce that the AI Translate Widget is set to become available as a standalone feature, independent from the QuickBlox UI Kit. We understand the importance of flexibility and customization, which is why this expansion is a significant step forward.
Moreover, staying true to our commitment to equipping developers with a plethora of tools, you’ll soon have the opportunity to harness the open-source code of these widgets directly from the QuickBlox UI toolkit.
Your innovation and creativity continue to drive the development landscape, and with QuickBlox, you have a partner dedicated to your success every step of the way. Stay tuned for more exciting updates and features to come!
Have Questions? Need Support?
Join the QuickBlox Developer Discord Community, where you can share ideas, learn about our software, & get support.
Join QuickBlox Discord
 AI Agent — automate conversations and workflows. Now available on Free plan